Note, If you haven’t read the overview on Making Braille Books at Home, start there.
Overview of Approach 2
This approach has four main steps:
- Get a digital copy of the print book you want to add braille to. I’ve had success with the 4 sources below:
- Reading A–Z (awesome for beginner books)
- A photocopier
- Your phone camera
- Kindle Cloud Reader
- Put braille paper in your home printer, and print out the book. Then print out a second copy on regular paper.
- Use your Perkins brailler to braille the text of the book right on top of the braille-paper copy, over the print and pictures. Follow the text on the second copy as you go. Tip: Most books I’ve done, I print out a two-page spread on a landscape sheet of 8.5×11 inch braille paper. I use the full 11 inch landscape-width of the page for both pages, putting the left-hand page at the top, and the right-hand page at the bottom. I separate the two pages with some blank space and a row of 2-5 dots.
- Bind your book. (See “binding” under Tools and Materials)
Below I give details on each source I’ve used for digital copies of print books. First a few asides:
- Note on copyright: Sources B–D involved making copies of books I owned in order to make them accessible for my daughter. My understanding is that this is perfectly legal under fair use. See for example this great Atlantic article, which states that “In 2012, a district court ruled that Hathitrust, a university consortium that used Google Books’s scans to make books accessible to blind students, was not only a legal form of fair use but also required by the Americans with Disabilities Act.”
- Note on software: For sources C and D, I took advantage of my full version of Adobe Acrobat to make them a bit easier. If you don’t have it, don’t buy it, as it is expensive. Try to find an alternative cheaper software work around, or just go with sources A or B. Also, for source D I found dropbox desktop software handy (free for a small account) for screen captures.
- Finally, scroll to the bottom to see comments on peeking and redacting for dual print/braille readers who might want to peak at the print.
Source A: Brailling Beginner Books with Help from Reading A–Z
Our daughter’s school subscribes to services from learninga-z.com and we ended up buying a 1 year license to their “Reading A-Z” product. It was $109 for a year, which at first seemed very expensive. We used it so extensively, however, that it turned out to be really excellent value. It was immeasurably helpful to us. Reading A-Z categorizes books into reading levels A through Z that roughly (although not exactly) correspond to Fountas and Pinnell reading levels. That was really helpful to me because my daughter’s school curriculum is based on the Fountas and Pinnell reading level assessments and our daughter’s teacher kept us updated on what was an appropriate reading level for our daughter. (For a primer on reading level metrics, see this handy explanation at Scholastic.) For each reading level, Reading A-Z has 75 books which you can download and print out. Each book takes 7 – 9 pages of 8.5 x 11 inch paper, which for print reading get easily cut or folded and stapled into a little book the size of half a standard sheet of paper.
This is super easy and I highly recommend it.
They have two formats. All the books are supposed to end up the size of half a sheet of 8.5 x 11 inch paper. But some are portrait orientation and some are landscape orientation. I find the portrait orientation easier. These print out as 2-page spreads on a landscape oriented full 8.5 x 11 inch sheet. These I print out on braille paper and braille and am done–I finish with an 8.5 x 11 inch product.
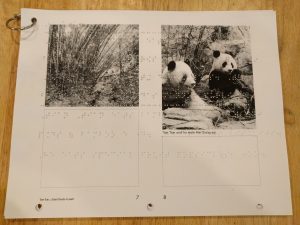
For example, here is a page from Tian Tian, a Giant Panda by Melanie Shepherd 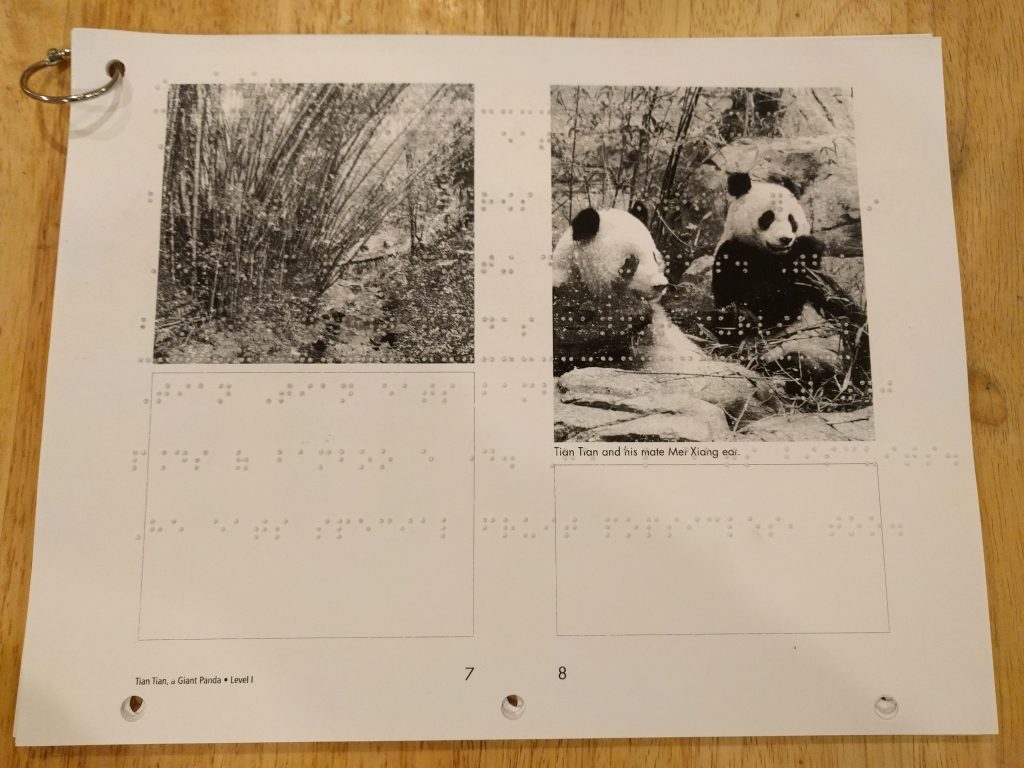
The landscape oriented books are a little more work – one has to cut the pages in half and re-sort them to get them in order. But when you are done it looks like it is supposed to, an 8.5 x 5.5 inch book.
Source B: A hard copy and your local copier:
This one is easy to explain. Photocopy your book page by page, and then scan it in.
Source C: A hard copy and your phone
- Get a hard copy of a book you want to braille
- Borrow your child’s slant board
- Put the book on the slant board, hold the pages open with one hand, while the other holds your phone horizontally and take photos of each two-page spread.
- Upload the photos to your PC. (I suggest using Dropbox, GDrive, iCloud, OneDrive or some such cloud sync to make is easy.)
- If you have the full version of Acrobat, on a windows PC you can select all the uploaded images in windows explorer, right click and select “combine files in Acrobat”. I suspect other software combinations could work, but this one is super easy. Alternatively, import all the images at once into Microsoft Word. But you’ll have some work ahead of you resizing each image to fit a single page.
This lets you get any book you want. But picture quality can be poor and it takes a long time. A couple of points: 1) Using the slant board is really important. If the book is flat on a table, your phone won’t know which way is up and some pictures will come out upside down. The slant board solves this problem. 2) Some phone apps will act more like a smart scanner, and give you a nicely cropped image of the book directly to PDF. My favorite is OfficeLens from Microsoft. But I used the camera and put up with the crap quality because it is WAY faster than anything else.
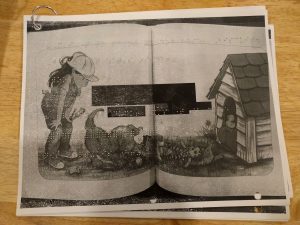
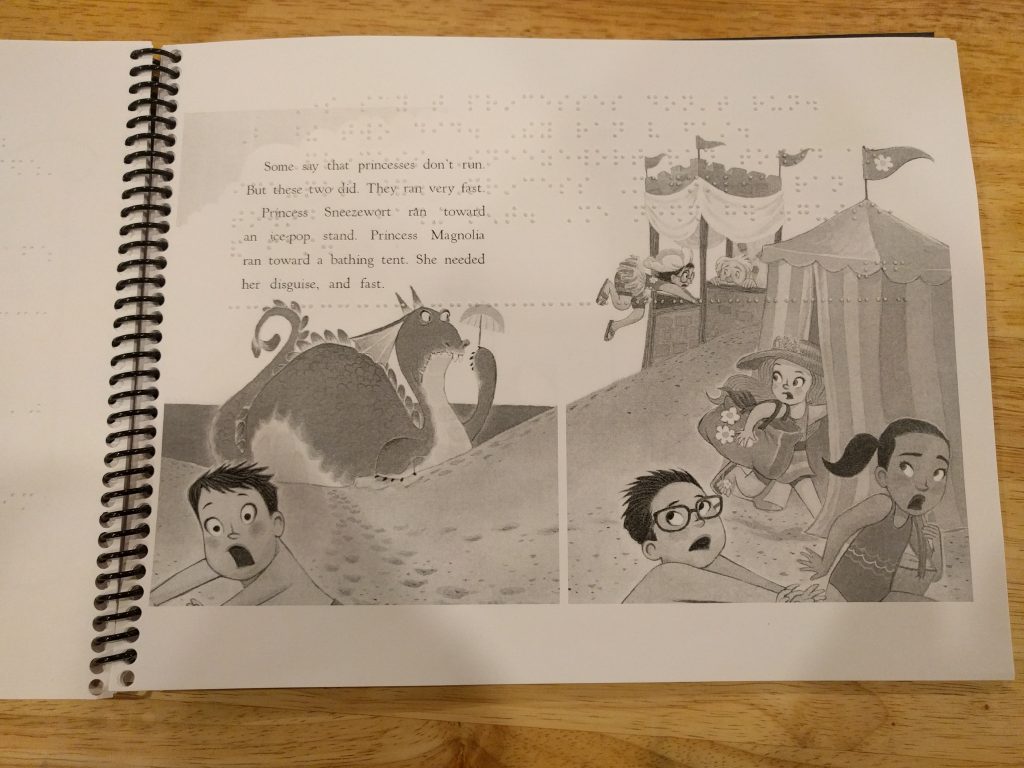
Here’s an example I produced with my phone, a page from Time to Paint Biscuit! by Alyssa Satin Capucilli.  (Notice I’ve redacted the print text to prevent peeking.)
Source D: Kindle Cloud Reader
At some point, Source A ran out of interesting material–the books were too boring when my daughter got to second grade. Also Sources B–C gave poor quality and were a pain in the butt. Hence Source D. For some kids books, like “The Princess in Black” books, Kindle stores each page as an image. For these I do the following:
- Verify Kindle stores each page as an image by downloading a free sample.
- If it checks out, buy the Kindle book and open it in on my Windows PC in Kindle Cloud Reader using my web browser.
- Choose my dropbox desktop program settings to
- Have dropbox capture screen shots (check “share screenshots using dropbox” under Preferences/Import)
- Disable all dropbox notifications (uncheck all boxes under Preferences/Notifications). Note: This is essential. Otherwise the notifications slow you down to a crawl and this will take forever.
- Take a screen shot of every page of the book, from start to finish. (ctrl-print-screen, next page, and so on…)
- Navigate to dropbox/screenshots. Select images from the book, right-click, and choose “combine files in acrobat”.
- You now have a digital copy of the book, but you’ve also capture the frame of your web browser around every page. In a full version of acrobat, under “tools”, choose “page”, and the “crop”. Crop one page to size, but before hitting “OK”, tick the box in the bottom right corner of options to “apply to all pages”. In one step you’ve cropped all pages identically. That was quick!
- Finally, some books the image may be a two-page spread and you are all set. Others, like the Princess in Black books, the original may contain pictures that span a full two page spread, but the Kindle version has one -image per page, rather than one image per two-page spread. To print it out as a two page spread, in the print dialog choose “multiple” under “Page Sizing & Handling” and then 2 pages per sheet. But to get the pagination right, you may need to use Tools/Pages/Insert Blank Page after the title page. Check and see if the 2-page pictures are coming out together or split across pages.
An example I produced this way is The Princess in Black Takes a Vacation by Shannon Hale and Dean Hale). You can see in the second picture below that I got the pagination right:
Peeking and Redacting
Early on I had to worry about my daughter peeking and reading the print when she was supposed to be reading the braille.
A-Z books have an easy solution. For sighted learners they produce “wordless books” that are intended for you to write your own story. We printed out these versions on braille paper for brailling, so there was no possibility of peeking at the print. Another wonderful thing about Reading A-Z. Compare the print and braille (wordless) versions of Tian Tian, a Giant Panda by Melanie Shepherd to see what I mean: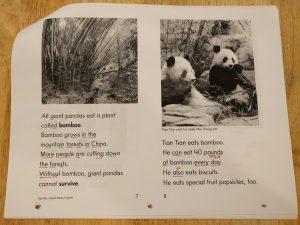
For any source, you can always redact by black marker after you print it out (and before brailling). A short cut I found for sources B, C, and D was to run Acrobat OCR on the files, and then use its redaction function to automatically find and redact all the text with black boxes. But that’s only a helpful tip if you have the full version of Acrobat. Before I worked out the auto-redacting option in Acrobat I added black boxes manually (that is tedious), as in Time to Paint Biscuit! by Alyssa Satin Capucilli: